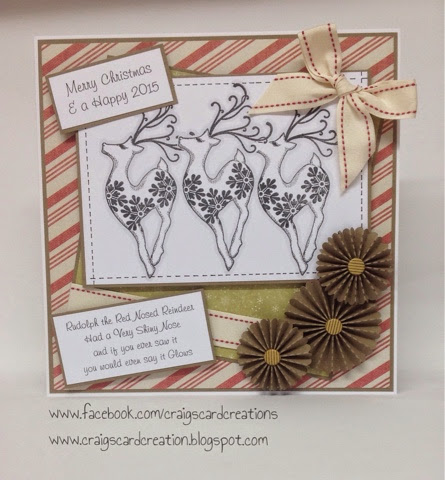
Good morning, well it was quite a mental day yesterday weather wise. Only once have I seen the wind and rain that bad. Lease it's settled down now. It was however a perfect day to sit with the heating on, a film on and craft. That's exactly what I done.
Many if not all know how to mat and layer and can follow my card layout so there for my steps below are 3 short steps on how to stamp and shadow your image using stix2 stencil sheet. If you are unsure of how to create the rest of card, I will be happy to write out the full step by step instructions.
1- take your piece of super smooth white card stamp your image on the card in the Center. Stamp the same image again on a piece of your Die cut stencil sheet and cut that out.
2- Place you cut out stencil sheet over the top of your main stamped image, reink your stamp and stamp your image again to the left, slightly overlapping your image. Repeat this step again but stamp to the right hand side. Remove your stencil sheet.
3- using your grey pen, go round the whole of your 3 images. This just makes a lovely shadow and your images stand out more.
Stix2 products-
6mm double sided tape - FPAL2732625.
6mm red ultra strong tape - S57090.
2mm A4 foam pads sheets - S57182.
5mmx5mmx3mm foam pads - S57083.
Silicone glue - S57100.
Craft sheet - S57132.
Layer perfect metric - S57321.
Pick up pencil - S57265.
Hot glue gun - S57234.
Hot melt glue sticks - S57235.
A4 die cut release sheet - S57316.
A4 die cut stencil sheet - S57329.
Additional products used-
Reindeer stamp - Kanban Crafts.
12x12 "traditional" page - Dove crafts back to basics.
6x6 "vintage" page - dove crafts back to basics.
Brown textured card stock - Bazzill Basics.
8x8 card blank - Craftwork Cards.
Card Candi - Craftwork Cards.
Neehna white stamping card - Crafters Companion.
Tuxedo black momento stamping ink.
Black fine liner pen.
Grey colouring pen - Spectrum Noir IG1.
Rosette die - Tim Holtz.
20mm ivory fabric ribbon.


No comments:
Post a Comment